Choosing the right Solar PV Inverter is a practical decision, not a simple price comparison. This device converts solar panels’ direct current into usable household electricity. It also influences system efficiency, safety, monitoring, and future expansion. A suitable model must match the panel array, grid requirements, battery plans, and local climate.
Start with the roof, not the brochure. A south-facing roof with little shade may suit a standard string inverter. Several roof angles or partial shading may require module-level optimizers or microinverters. Check the inverter’s maximum input voltage, operating range, and continuous output rating. A mismatch can reduce production or create avoidable design problems.
Details matter.
During site assessments, installers should consider summer heat, winter temperatures, cable distance, ventilation, and available wall space. An inverter mounted beside a dusty shed may face different conditions from one installed in a cool utility room. Review efficiency curves, warranty terms, protection features, and monitoring quality. Certification and compliance with local electrical rules are essential. Ask who provides service when an error code appears on a weekend.
There is no universal best choice. A cheaper inverter may offer strong value, yet its software or support may disappoint. A premium model may provide better monitoring, but its extra features might remain unused. My first preference can be wrong when shading, battery goals, or installer experience changes. Compare verified datasheets, independent testing, and realistic production estimates. The right decision balances performance, safety, maintainability, and total ownership cost over many years.
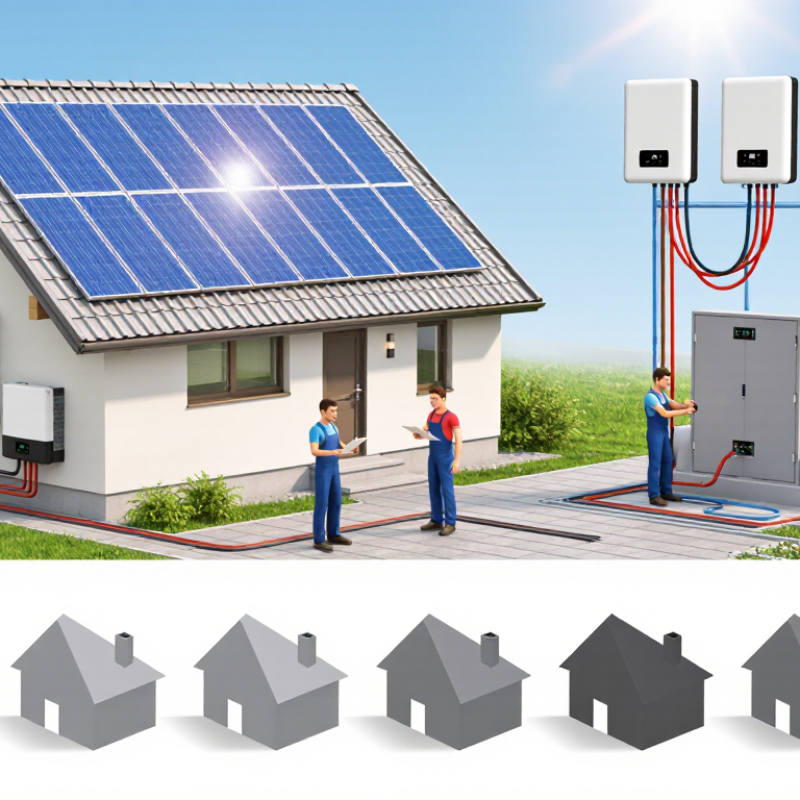
Choosing the right solar PV inverter starts with defining your system requirements. Estimate annual electricity use from twelve months of utility bills. Then identify daytime loads, evening demand, and seasonal changes. A home using 18 kWh daily needs different planning than a workshop with morning machinery. Record roof orientation, shading, available area, and local temperature extremes.
The IEA PVPS Trends 2024 report states that global photovoltaic capacity exceeded 1.6 terawatts by the end of 2023. This rapid expansion makes careful system design more important, not less. Match inverter capacity with the array’s expected output, rather than its theoretical peak alone.
Think beyond today’s electricity bill. You may add battery storage, an electric vehicle, heat pumps, or backup circuits later. Confirm voltage, phase configuration, maximum DC input, operating temperature, and monitoring functions. A practical installer should explain these limits using your site data. Ask for expected annual yield, efficiency assumptions, and maintenance access. Small details matter.
Be cautious with optimistic forecasts. Real roofs are rarely perfect. Dust, shadows, wiring losses, and future panel degradation reduce output. IEA PVPS and NREL data support disciplined estimates, but neither replaces a site survey. Your energy goal may also be unclear at first. That is normal. Recheck the design after comparing measured consumption with your preferred backup or savings target.

Choosing a solar inverter starts with the installation design, not the equipment label. A string inverter suits a roof with consistent sunlight and similar panel angles. Several panels share one conversion point. This keeps wiring and maintenance simpler. However, shade on one section can reduce the output of the whole string.
Microinverters work differently. Each panel converts power independently. They fit complex roofs with multiple orientations, chimneys, or partial shade. Panel-level monitoring can also reveal a weak connection or damaged module. The trade-off is more rooftop electronics. Future access may be inconvenient. Think about maintenance before installation.
Power optimizers sit between these approaches. They manage panel-level performance while sending power to a central inverter. This can help on roofs with uneven sunlight, but the system remains dependent on one main conversion unit. Hybrid inverters suit homes planning battery storage. They coordinate solar generation, battery charging, and selected backup circuits. Yet battery systems need careful load calculations and suitable ventilation.
Installers should check array voltage, peak current, local temperatures, roof space, and cable distances. A cold morning can raise voltage beyond a careless design limit. That detail matters. In practice, the cheapest option is not always the most reliable. I have seen simple roofs receive unnecessarily complex systems. I have also seen shaded roofs fitted with basic string designs, creating avoidable losses. Compare expected energy yield, monitoring access, service conditions, and expansion plans before choosing. No design is perfect. The right inverter is the one that matches the roof’s real behavior.
Choosing the right inverter starts with the panels, not the appliance list. The IEA PVPS Trends in Photovoltaic Applications 2024 report recorded more than 400 GW of new solar capacity worldwide in 2023. Rapid deployment makes accurate sizing increasingly important. NREL’s 2024 Annual Technology Baseline commonly models utility-scale systems with a DC-to-AC ratio near 1.3. This allows panels to produce more energy during mornings, afternoons, and weak sunlight. However, clipping still occurs. A 1.3 ratio is not a rule.
Match the inverter’s AC output with the site’s real load and export limit. A 10 kW array may pair with an 8 kW inverter when midday demand is moderate. That choice can reduce equipment cost, but it may waste energy during clear summer hours. If local rules limit export, a larger inverter may add little value.
Check the inverter’s maximum DC voltage, MPPT voltage range, and current rating. Cold weather matters. Panel voltage rises when temperatures fall.
Grid conditions can overturn a neat calculation. The IEA Renewables 2024 report identifies grid bottlenecks and connection delays as major barriers to faster renewable deployment. A weak feeder may require reactive-power control, ramp-rate limits, or export management. Site measurements are essential. Review voltage variation, transformer capacity, and nearby load patterns. A spreadsheet can miss these details. In practice, the “optimal” ratio often needs revision after the site survey. That is not failure; it is better engineering.
Choosing a solar PV inverter starts with efficiency, but the highest number is not always the best choice. Fraunhofer ISE’s Photovoltaics Report 2024 lists modern inverters with maximum efficiencies around 98–99%. That difference looks small. Yet heat, shading, cable length, and low-load operation can reduce real-world output. Check European or California efficiency ratings, not only peak efficiency. Site conditions matter more than a laboratory headline.
Safety deserves equal attention. Look for protection against overvoltage, islanding, ground faults, overheating, and arc faults where required. IEC 62109 and UL 1741 provide useful safety benchmarks. Confirm local grid-code compliance before installation. Small details matter, such as clearances around the inverter and accessible disconnects. Do not hide the unit in a damp corner. That mistake is surprisingly common.
Monitoring should show daily energy, voltage, temperature, alarms, and historical performance. The NREL Best Practices for Operation and Maintenance recommends systematic monitoring and documented fault response. A useful platform should identify abnormal production, not merely display attractive charts. Warranty terms need the same scrutiny. Compare coverage length, labor, shipping, replacement procedures, and exclusions. Industry warranties often range from five to twelve years, with optional extensions. Longer is not automatically safer. If support is slow, a paper promise may offer little practical value. I once treated a one-percent efficiency gap as decisive; that was too simplistic. A reliable inverter with clear monitoring may produce more value over time.
| Evaluation Dimension | Recommended Benchmark | Typical Residential String Inverter | Typical Hybrid Inverter | Typical Microinverter System | What to Verify Before Purchase |
|---|---|---|---|---|---|
| Conversion Efficiency | Choose a high peak efficiency and a strong weighted efficiency at normal operating loads. | Peak efficiency commonly reaches approximately 97%–99%. | Grid-connected conversion is commonly about 96%–99%; battery charging and discharging introduce additional losses. | Peak efficiency commonly reaches approximately 95%–98%. | Compare the datasheet’s maximum and European or CEC weighted efficiency, not only the headline peak value. |
| System Architecture | Match the architecture to roof complexity, shading, storage plans, and maintenance preferences. | One inverter serves multiple panels; suitable for many uniform, low-shading roofs. | Combines PV conversion with battery charging, battery discharge, and backup functions. | One small inverter is installed per module; useful where roofs have multiple orientations or partial shading. | Check whether future battery integration, backup loads, or module-level replacement is required. |
| Maximum Power Point Tracking | Use multiple MPPT channels when strings face different directions or receive different shading conditions. | Often provides 1–3 MPPTs, depending on power class. | Often provides 2–4 MPPTs, depending on system size and design. | MPPT is normally performed at module level, limiting mismatch between panels. | Confirm the number of MPPTs, operating-voltage range, startup voltage, and maximum input current per tracker. |
| Partial-Shading Performance | Prioritize module-level optimization or independent trackers when shading changes during the day. | Performance may be reduced when panels on the same string are unevenly shaded. | Similar string-level behavior unless module-level optimizers or additional MPPT channels are used. | Usually performs well with uneven roof orientations and module-level shading. | Review shade analysis and expected annual energy yield rather than comparing efficiency alone. |
| DC and AC Safety | Select equipment with certified protection appropriate to the installation code and local grid rules. | Common features include overvoltage, overcurrent, short-circuit, anti-islanding, and over-temperature protection. | Typically includes PV, battery, AC, and backup-output protection, but functions vary by model. | Includes module-level protection; system-level AC protection is still required. | Check applicable electrical certifications, isolation monitoring, anti-islanding compliance, and required disconnects. |
| Arc-Fault Protection | Strongly consider arc-fault detection where required by local regulations or installation conditions. | May be integrated on compatible models; availability depends on jurisdiction and product class. | May be integrated, but PV and battery circuits must be checked separately. | System-level requirements vary; verify compatibility with the complete microinverter installation. | Confirm the exact standard, detection scope, shutdown behavior, and whether the feature is enabled by default. |
| Ingress Protection | For outdoor installation, use an enclosure rating suitable for rain, dust, and the planned mounting location. | Outdoor models commonly use IP65 or higher. | Outdoor models commonly use IP65 or higher; battery interfaces may have separate ratings. | Module-level units commonly use outdoor-rated enclosures, often around IP67. | Verify the exact IP rating, permitted mounting position, humidity limits, corrosion resistance, and temperature range. |
| Operating Temperature | Choose a unit whose rated range covers local extremes without frequent thermal derating. | Many outdoor units are rated approximately from -25°C to +60°C, with derating at high temperatures. | Many units have a similar approximate range, but battery temperature limits can be narrower. | Module-level units commonly operate within approximately -40°C to +65°C, depending on design. | Check the derating curve, ventilation clearance, direct-sun exposure, and installation altitude limits. |
| Monitoring and Data Access | At minimum, monitor energy production, alerts, system status, and historical performance. | Usually provides system-level monitoring through Wi-Fi, Ethernet, cellular, or a local gateway. | Usually monitors PV generation, battery state of charge, grid import/export, and backup status. | Often provides module-level production and fault visibility through a gateway or communication device. | Confirm internet dependence, data update interval, mobile and web access, export options, and software fees. |
| Backup and Grid Support | Specify backup circuits, transfer time, maximum backup power, and grid-support functions before selecting the inverter. | Standard grid-tied units generally shut down during a grid outage unless paired with approved backup equipment. | Can support backup loads when correctly configured with a battery, transfer equipment, and compatible wiring. | Usually requires additional system equipment for backup operation; capability is system-dependent. | Check continuous and surge power, phase configuration, transfer time, black-start capability, and local utility requirements. |
| Warranty Duration | A longer warranty is useful only when supported by clear terms and a dependable service process. | Standard coverage is commonly around 5–12 years, with extensions available for some products. | Coverage is commonly around 5–12 years; battery-related coverage may be separate. | Coverage is commonly around 10–25 years, depending on the complete system configuration. | Review parts, labor, shipping, exclusions, registration deadlines, transferability, and replacement procedures. |
| Installation and Maintenance | Balance installation labor, accessibility, replacement time, and the availability of qualified technicians. | Fewer electronic units can simplify servicing, but a single failure may affect the whole array. | Requires careful configuration of PV, battery, backup, and energy-management settings. | Module-level replacement can reduce the impact of one failure but may increase component count. | Request a single-line diagram, commissioning checklist, maintenance procedure, and local service contacts. |
| Best-Fit Application | Select based on the site rather than choosing by efficiency or warranty length alone. | Simple, low-shading roofs | Storage and backup projects | Complex roofs or module-level control | Use a site-specific energy model that includes shading, orientation, temperature, clipping, battery losses, and degradation. |
| Practical selection rule: First confirm electrical compatibility and local compliance, then compare annual energy yield, safety functions, monitoring quality, service support, and the full warranty terms. Typical ranges shown above are industry-wide reference values rather than guaranteed specifications; always verify the current product datasheet and certification documents for the exact inverter. | |||||
Choosing a solar PV inverter starts with more than comparing output ratings. A reliable unit should match the array’s DC capacity, local grid requirements, roof conditions, and expected temperature range. Check independent test results, safety certifications, warranty terms, and service coverage before studying price. A low-cost inverter may become expensive if replacement support is slow. Look for clear monitoring data, fault codes, and documented efficiency at partial load. Real homes rarely operate at perfect midday conditions.
Professional installation matters just as much. Ask whether the installer holds current electrical qualifications and can provide recent project references. The site assessment should include roof shading, cable routes, ventilation, isolation points, surge protection, and space for safe maintenance. Installers should explain clipping, shutdown behavior, export limits, and battery compatibility in plain language. They should also manage permits, utility applications, and commissioning records. A neat wall-mounted installation is not enough. Loose terminals or poor airflow can shorten service life.
Request a written design with panel layout, inverter model, estimated annual yield, and expected losses. Compare realistic scenarios, not only the best forecast. Even careful plans can miss unusual shade or future building changes. Leave room for questions. Inspect the final labels, cable supports, and monitoring connection before signing off. Performance should be checked after commissioning and again after the first season.
Typical non-brand-specific planning benchmarks for inverter efficiency at different operating loads. Always verify the exact efficiency curve, protection features, grid compatibility, warranty terms, and installation requirements in the product datasheet.
Efficiency is usually lower at very light loads and highest near the inverter’s normal operating range. Professional installation helps ensure correct cable sizing, ventilation, grounding, surge protection, commissioning, and compliance with local electrical regulations.